# Type at least 1 character to search # Hit enter to search or ESC to close
Black Friday Sale Starts 21 November!
SAVE while stocks last ♡♡♡
Search
Browse by Category
-
-
NOVEMBER 2025 - ...
Nov 05, 2025 -
Silk Ribbon Embro...
Oct 29, 2025
Recent Posts
- November 2025
- October 2025
- September 2025
Blog > Silk Ribbon Embroidery-How to Make a Tansy Fairy

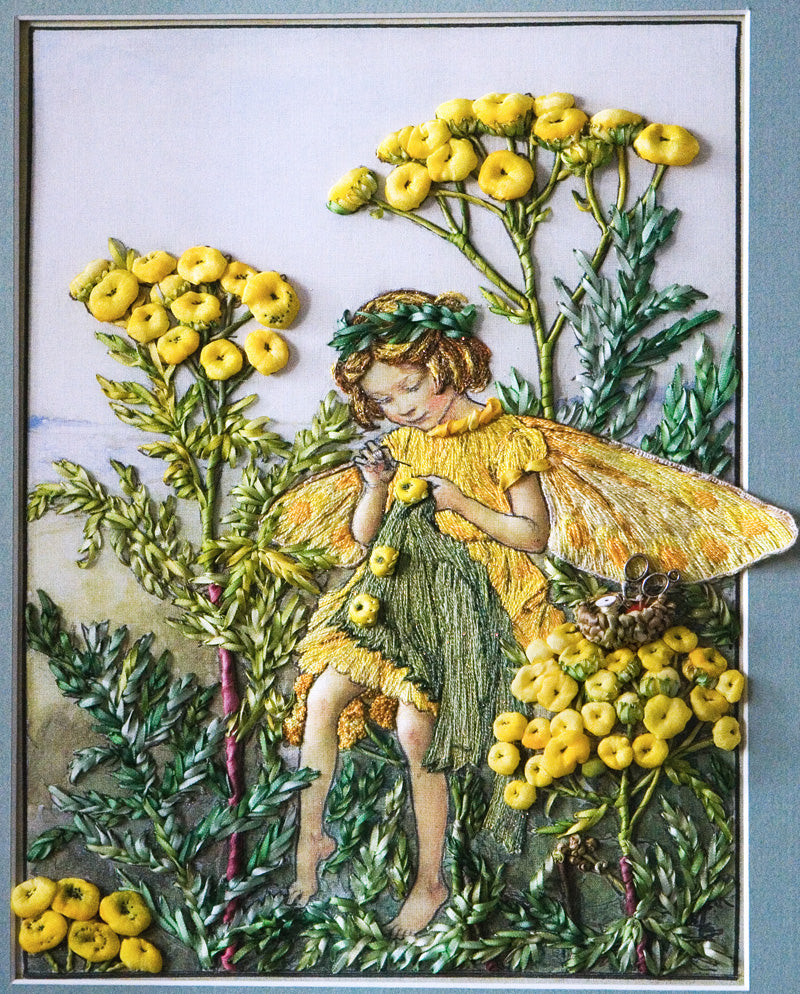
Today I have a beautiful Fairy to show you… I am sure that many of you will enjoy seeing her, as she is doing what we all love best — embroidery! ![]()
The Tansy Flower Fairy™, embroidered by Marina Zherdeva, an incredibly talented embroiderer.
This is the original artwork by Cicely Mary Barker…

.
And this is how Marina has made it into a masterpiece in embroidery, so dimensional… with the prettiest shades of yellow and green. Marina says that all the ribbons she used are from my range of ribbons.

.
I love the way she made the little round flowers.
You could learn this flower-making technique on page 149 of my Roses book.
.

.
The thick stem can be made with whipped back stitch ...
I have written a tutorial for you on how to make thick stems here.
.

.
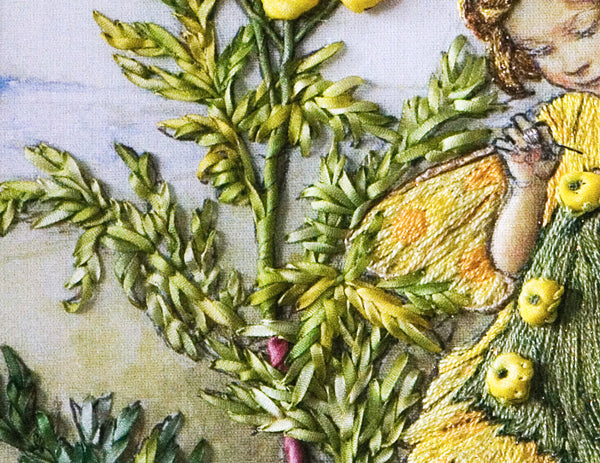
The leaves are straight and ribbon stitch.
See how they are raised off the surface of the design?
To achieve this, Marina worked over a spare tapestry needle and used a very gentle tension as she pulled the ribbon to the back of her work.
.

.
The thin stalks carrying the yellow flowers are made in twisted straight stitch.
Twirl the ribbon to form a cylindrical shape before inserting the needle back into the fabric. You will learn more about this technique on page 96 in my Flower Fairy™ book.
.

.
See how each leaf extends from the stem outwards? Remember to follow nature as closely as possible by starting the stitch closest to the stem and working outwards. Even if you cannot see the stem, it is wise to stitch the stems first. Use brown or dark green thread and stem stitch to build a framework for you to see where the leaves should branch off from.
.

I love the way Marina has made the Fairy’s wings. To achieve the free-standing wing on the right, you could refer to the same method that I used for the Stork’s Bill Fairy which is on page 127 of my Flower Fairies™ book.
The little dress and the jacket are filled in with long and short stitch and you will see how to do this in my Fairy book on page 87….and Awwwww! I love the little basket and sewing tools! It’s adorable.
Marina wrote: "Basket is a stumpwork piece: straight and ribbon stitch on a piece of silk organza"

.
The little Fairy’s hair is made in the same way as shown on page 93 in the book
....and I have written a tutorial about it here.
The leaves are straight and ribbon stitch, as for all the other leaves.
.

Don't you just love the little buttons?
Enjoy the rest of your day everyone
Love
Di
2 comments
Leave a comment
Shop Dicraft
Browse Dicraft
General Info
Get regular newsletters packed with tips, specials and new products!
Copyright © DI VAN NIEKERK. ALL RIGHTS RESERVED.


S.C. Jacobs
Thank you for sharing your tips and tricks, I learn so much from your tutorials each time. And Marina is so talented, she did an excellent job making this beauty.
Karen Fraser
I want a kit. Is it available?. It is gorgeous. This is fantastic.