
# Type at least 1 character to search # Hit enter to search or ESC to close
Cart


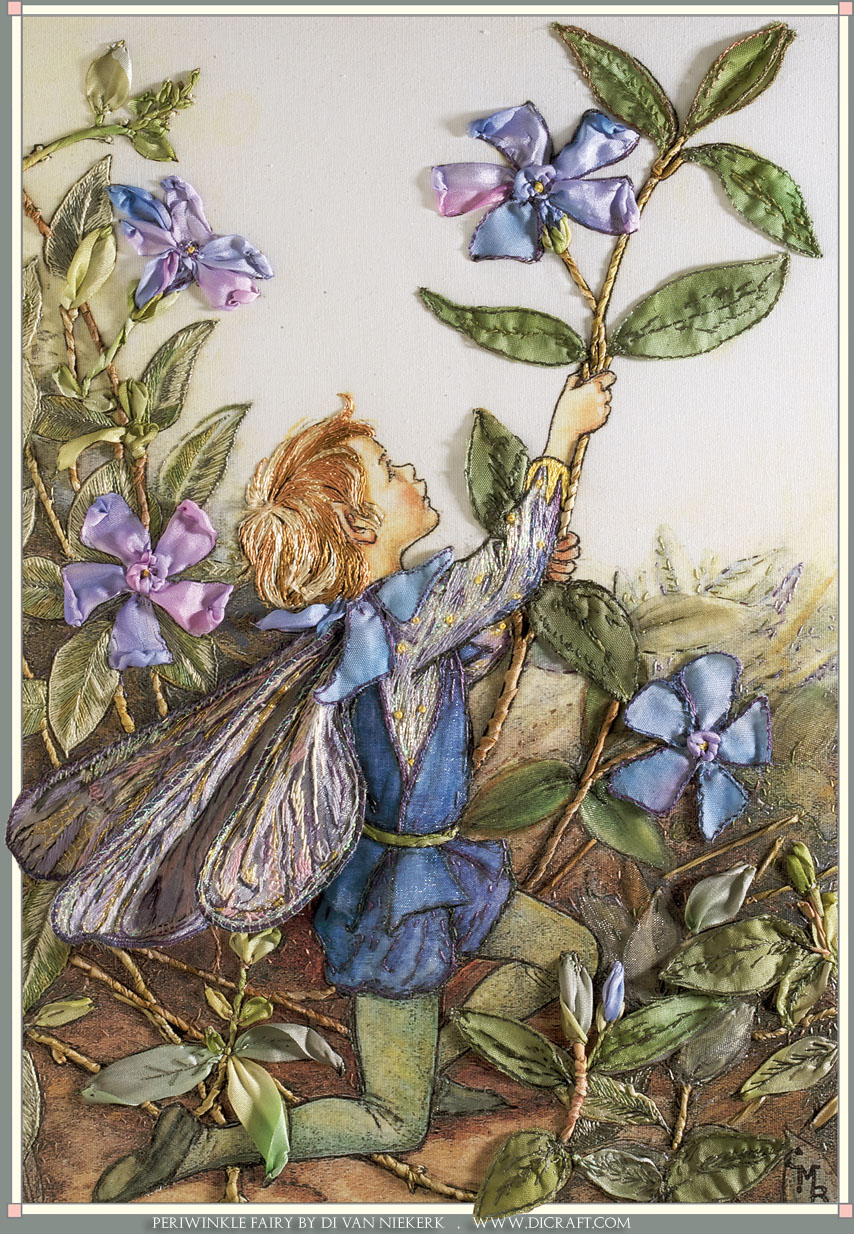
 The waistcoat and upper part of the Periwinkle fairy were raised using an easy Trapunto method below.
Method
-Use a white square of silky fabric or fine cotton which is the same size as the embroidered cloth.
-Remove your embroidered piece from the hoop or frame and add this new layer of fabric at the back.
-Replace all the layers back into the hoop or frame, stretching them taut as a drum.
-Remove the creases on your embroidered design, backing fabric and the new layer by gently pulling along the edges of the fabric layers and tightening the hoop once you are happy that there are no creases on the front or at the back of your work. The layers should be as smooth as a drum.
-Use one strand of any matching brown, grey, purple or green thread and on the right side of your work, stitch along the edge of the shape, working through all the layers in stab stitch.
The waistcoat and upper part of the Periwinkle fairy were raised using an easy Trapunto method below.
Method
-Use a white square of silky fabric or fine cotton which is the same size as the embroidered cloth.
-Remove your embroidered piece from the hoop or frame and add this new layer of fabric at the back.
-Replace all the layers back into the hoop or frame, stretching them taut as a drum.
-Remove the creases on your embroidered design, backing fabric and the new layer by gently pulling along the edges of the fabric layers and tightening the hoop once you are happy that there are no creases on the front or at the back of your work. The layers should be as smooth as a drum.
-Use one strand of any matching brown, grey, purple or green thread and on the right side of your work, stitch along the edge of the shape, working through all the layers in stab stitch.
 The back of the Periwinkle Fairy panel
-Turn to the back and see the outline of the shape. Use a seam-ripper or the sharp point of your embroidery scissors and carefully insert only the point to lift the back layer up off the design first. Be careful not to cut the stitches or the backing fabric. Make a small slit in the fabric about 2 to 3 cm (1 in.) in length. If the shape allows it, make two slits as it is easier to insert the wadding into the shape this way.
-Use a small piece of soft toy filling, woolly fibre or shredded wadding; insert it into the opening and gently push it into place with the blunt end of the tapestry needle, metal nail file, or similar object. Push small pieces of wadding into place and keep turning your work to the right side to check whether you are happy with the placement of the filling.
-As soon as the shape is raised up off the design, close the opening with small stitches as shown above.
Hint: be sure not to overfill the shape. Place your work a metre (a yard) or so away from you; if the shape is too noticeable, or the fabric has puckered along the edge of the shape, remove some filling. Trapunto is a subtle technique, and in this case, it should complement rather than overshadow the design. Close the gap at the back with small overcast stitches, stitching into the wadding so the stitches are not visible on the right side of your work.
The back of the Periwinkle Fairy panel
-Turn to the back and see the outline of the shape. Use a seam-ripper or the sharp point of your embroidery scissors and carefully insert only the point to lift the back layer up off the design first. Be careful not to cut the stitches or the backing fabric. Make a small slit in the fabric about 2 to 3 cm (1 in.) in length. If the shape allows it, make two slits as it is easier to insert the wadding into the shape this way.
-Use a small piece of soft toy filling, woolly fibre or shredded wadding; insert it into the opening and gently push it into place with the blunt end of the tapestry needle, metal nail file, or similar object. Push small pieces of wadding into place and keep turning your work to the right side to check whether you are happy with the placement of the filling.
-As soon as the shape is raised up off the design, close the opening with small stitches as shown above.
Hint: be sure not to overfill the shape. Place your work a metre (a yard) or so away from you; if the shape is too noticeable, or the fabric has puckered along the edge of the shape, remove some filling. Trapunto is a subtle technique, and in this case, it should complement rather than overshadow the design. Close the gap at the back with small overcast stitches, stitching into the wadding so the stitches are not visible on the right side of your work.
 Ideal for the complete beginner, this lovely kit is available if you have my Flower Fairy book. Read more about it here.
You are welcome to order my Flower Fairy book here.
I have some more hints and tips to share with you in the weeks to come.
You are welcome to:
Ideal for the complete beginner, this lovely kit is available if you have my Flower Fairy book. Read more about it here.
You are welcome to order my Flower Fairy book here.
I have some more hints and tips to share with you in the weeks to come.
You are welcome to:
Get regular newsletters packed with tips, specials and new products!
Copyright © DI VAN NIEKERK. ALL RIGHTS RESERVED.
Added to cart successfully!

Leave a comment