How to make interesting shadows and leaves with silk and woolly fibre
This short tutorial is from the best-selling book: Little Flowers by Di van Niekerk & Marina Zherdeva
How to make interesting shadows and leaves for ribbon embroidery
An extract from Wild Roses and Pink Blossoms on page 139.
Use wisps of wool and silky fibre to form shadows and background texture.
It is a wonderful way to add an interesting feathery texture (and more colour) to your design.
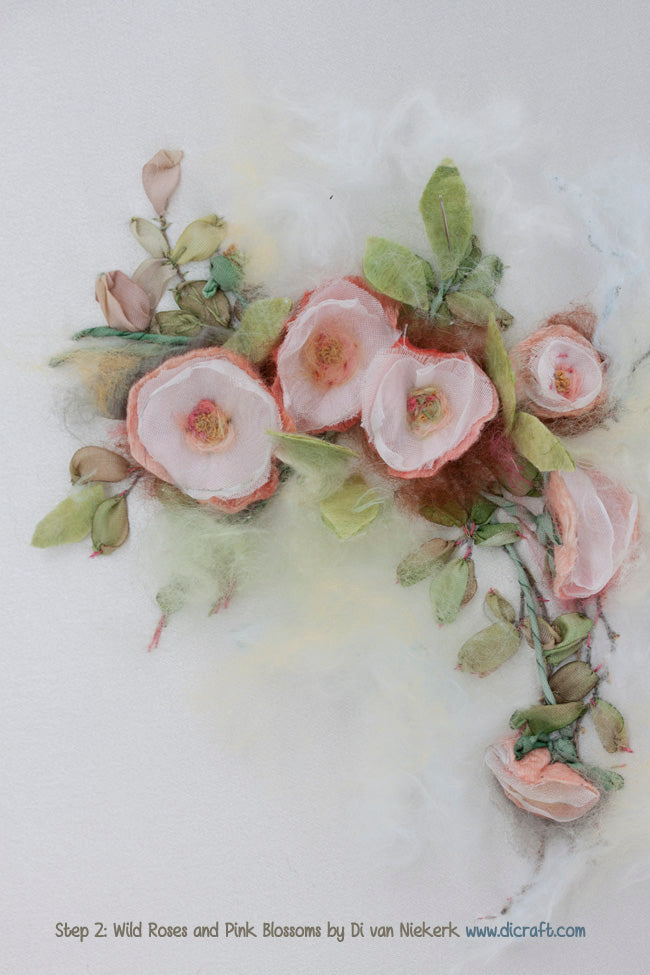
Click on the images to enlarge1. Embroider the design (above) as shown on pages 139 to 151.Then add texture and colour as follows.Click on images to enlarge2. Use fluffy hand-dyed woolly fibre to create the shadows under the roses first.
Tear bits of brown woolly fibre and place it under each rose.
Use the points of your scissors to gently push the fibre underneath.
Tear a piece of grey silk paper and place under the bottom rose in the picture above.
Next, tear thin pieces of pale green and yellow then add the palest blue on the outer edges.
See the picture above. Click on the image to enlarge.
Place everything as you would like it to be and then make the silk paper leaves.
3. Use the green silk paper and refer to the leaf shape (above) as a guide.
Cut as many leaves as you need for your project.
Place amongst the roses, on top of the fibre.
4. Use one strand of pink or green thread to secure the shapes with small stab stitches.5. Use the same stitch and secure other fibres onto your fabric.
Space stitches only where necessary to hold the fibres in place.
Work with a gentle tension so as not to pull the adjoining pieces out of place, holding the thread so that it does not catch onto the fibres and leaves.
6. Do the same for the brown fibre under the roses. Only a few stitches are necessary to hold the fibre in place.7. With darker pink thread, make veins on the leaves in straight stitch, allowing the tip of the leaves to be lifted off your design.
Add more fibre where you see fit. See how I added grey fibre under rose 1 (above) for balance?
9. Add a few more stamens with golden yellow thread. Use French knots (three wraps around needle).
Refer to the picture and add more detail (such as golden yellow stitches on some leaves) until you are happy with your creation.
I hope you enjoyed this tutorial. You are welcome to subscribe to keep in touch as I post new ones.You are welcome to read more news in latest newsletter here. Happy weekend stitching world!LoveDi♥


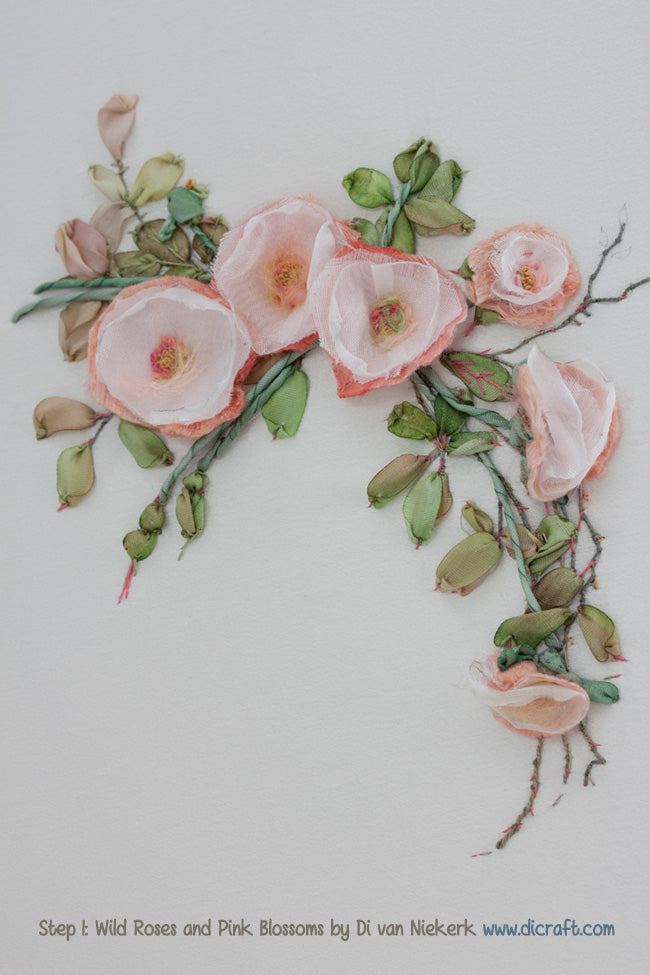 1. Embroider the design (above) as shown on pages 139 to 151.
Then add texture and colour as follows.
Click on images to enlarge
1. Embroider the design (above) as shown on pages 139 to 151.
Then add texture and colour as follows.
Click on images to enlarge
 2. Use fluffy hand-dyed woolly fibre to create the shadows under the roses first.
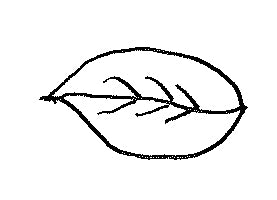 3. Use the green silk paper and refer to the leaf shape (above) as a guide.

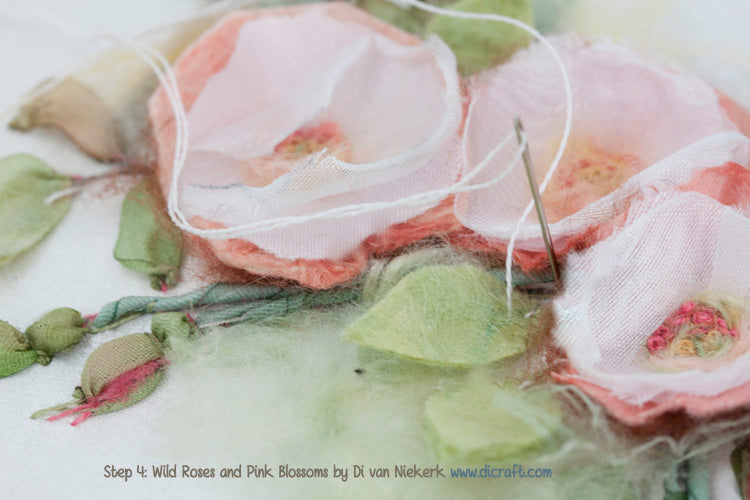 5. Use the same stitch and secure other fibres onto your fabric.

 7. With darker pink thread, make veins on the leaves in straight stitch, allowing the tip of the leaves to be lifted off your design.

 9. Add a few more stamens with golden yellow thread. Use French knots (three wraps around needle).

 I hope you enjoyed this tutorial. You are welcome to subscribe to keep in touch as I post new ones.
You are welcome to read more news in latest newsletter here.
Happy weekend stitching world!
Love
Di
♥
I hope you enjoyed this tutorial. You are welcome to subscribe to keep in touch as I post new ones.
You are welcome to read more news in latest newsletter here.
Happy weekend stitching world!
Love
Di
♥

Leave a comment