
# Type at least 1 character to search # Hit enter to search or ESC to close
Cart


 Method
Trace the shape of a leaf (similar to the leaves below) onto tracing paper.
Method
Trace the shape of a leaf (similar to the leaves below) onto tracing paper.

 Pin or staple the tracing paper onto a felt block (green or white felt is good) and cut along the edge of the leaf.
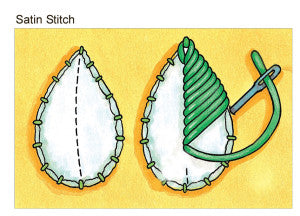
Secure the felt shape onto your design with tiny stab stitches along the edge of the felt.
Pin or staple the tracing paper onto a felt block (green or white felt is good) and cut along the edge of the leaf.
Secure the felt shape onto your design with tiny stab stitches along the edge of the felt.
 Use one or two strands of green silk or cotton thread and satin stitch to cover the felt as follows:
- Start at the tip of the leaf and make a detached chain stitch (lazy daisy stitch) to form a neat tip.
Use one or two strands of green silk or cotton thread and satin stitch to cover the felt as follows:
- Start at the tip of the leaf and make a detached chain stitch (lazy daisy stitch) to form a neat tip.
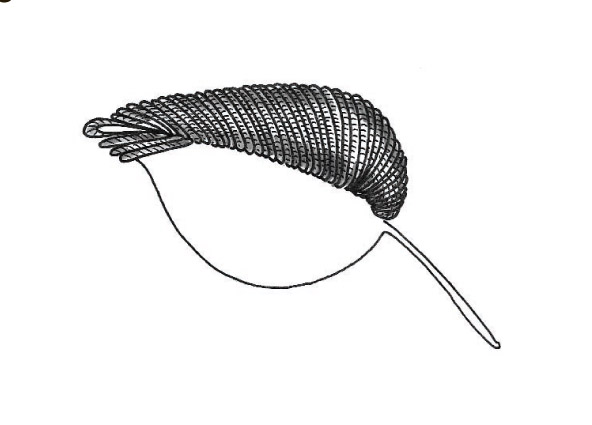
 - Then proceed with satin stitch packing the stitches close together to cover the felt.
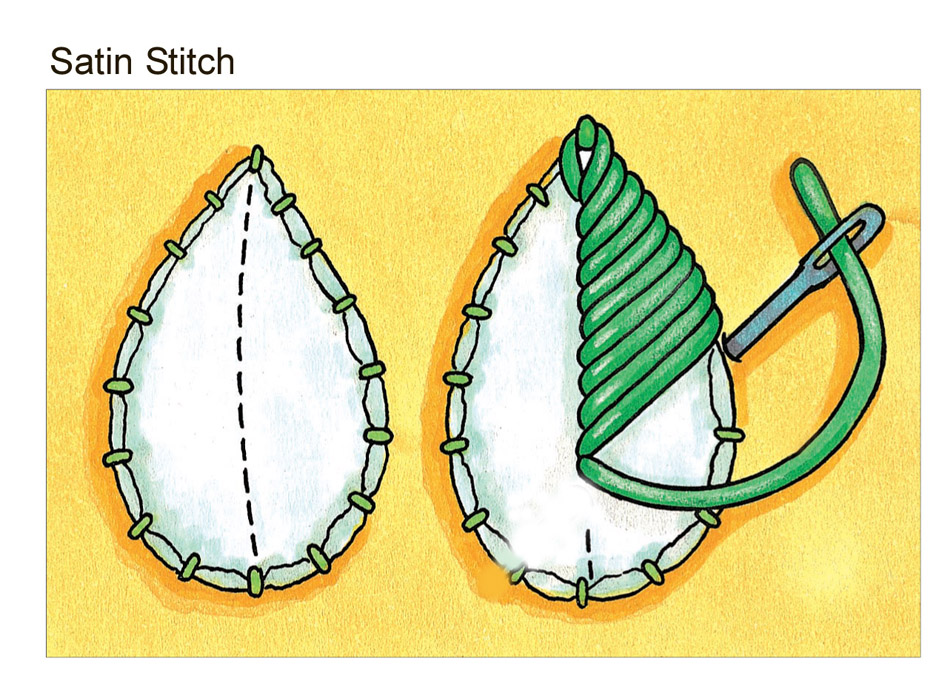 Hint: Angle the needle towards the leaf when you insert it to the back of your work. Tuck in the felt as you stitch. This will help to form a neat edge.
Refer to the picture above as a guide.
Add a central vein with the same colour thread (two strands) and use split stitch working through all the layers.
Hint: Angle the needle towards the leaf when you insert it to the back of your work. Tuck in the felt as you stitch. This will help to form a neat edge.
Refer to the picture above as a guide.
Add a central vein with the same colour thread (two strands) and use split stitch working through all the layers.

 Make the stem in detached buttonhole stitch. Use two strands of the same green thread.
 1. Make a long straight stitch to form the stem.
2. Come up at either end of the stem and cover the stitch with blanket/buttonhole stitch, working under and over the thread. Do not take the needle to the back of your work until the thread is covered.
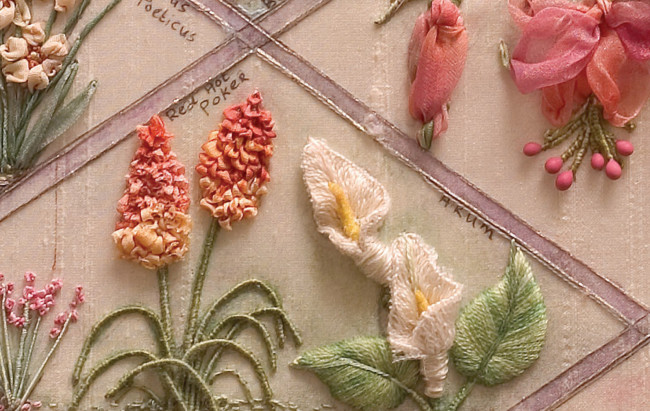
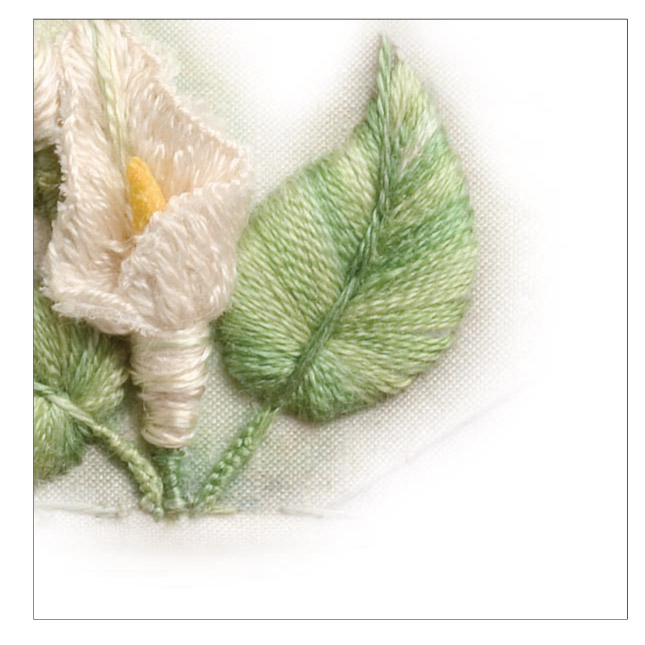
Next time I will show you how to make the Arum Lily.
Enjoy the rest of your day…. it’s nearly weekend! It is 30 degrees Celsius here today, so I am sending everybody in the cold parts of the world the hottest African sunshine to warm you up.
Till next time
Happy stitching
Love
Di
♥
1. Make a long straight stitch to form the stem.
2. Come up at either end of the stem and cover the stitch with blanket/buttonhole stitch, working under and over the thread. Do not take the needle to the back of your work until the thread is covered.
Next time I will show you how to make the Arum Lily.
Enjoy the rest of your day…. it’s nearly weekend! It is 30 degrees Celsius here today, so I am sending everybody in the cold parts of the world the hottest African sunshine to warm you up.
Till next time
Happy stitching
Love
Di
♥
Get regular newsletters packed with tips, specials and new products!
Copyright © DI VAN NIEKERK. ALL RIGHTS RESERVED.
Added to cart successfully!

Leave a comment