Hi everybody! Hope you enjoyed your weekend. It's been raining nicely in Cape Town and there's snow in the mountainous areas. The fire is going and everyone is happy ♥ 
♥ If you like, you can purchase the complete kit for all six chapters here or you can purchase individual packs for the chapters below. It is however easier to purchase the complete kit as you will save on the courier fee.
This is Chapter 3 of the Pink Delight project, a project that I have been teaching online. See chapter 1 here and chapter 2 here. It is turning out to be a beauty - a most enjoyable project. I hope that those of you who already have the kit for part 1 and 2 are having fun as well!This is a fun, colourful project and if you would like to follow the step-by-step tutorials for this lovely panel, you are welcome to purchase the embroidery panel and the first set of threads and ribbons for chapter 1, 2 and 3.
If you need to purchase needles, we now have a very useful multipurpose pack of needles, especially for ribbon embroidery and stumpwork.
As I progress, the second set of threads and ribbons will be made available for Chapter 4 onwards and this I will teach on my blog after my return from BATB in Adelaide. Probably in November. To stay in touch with the latest blog posts and kits, you are welcome to subscribe here.
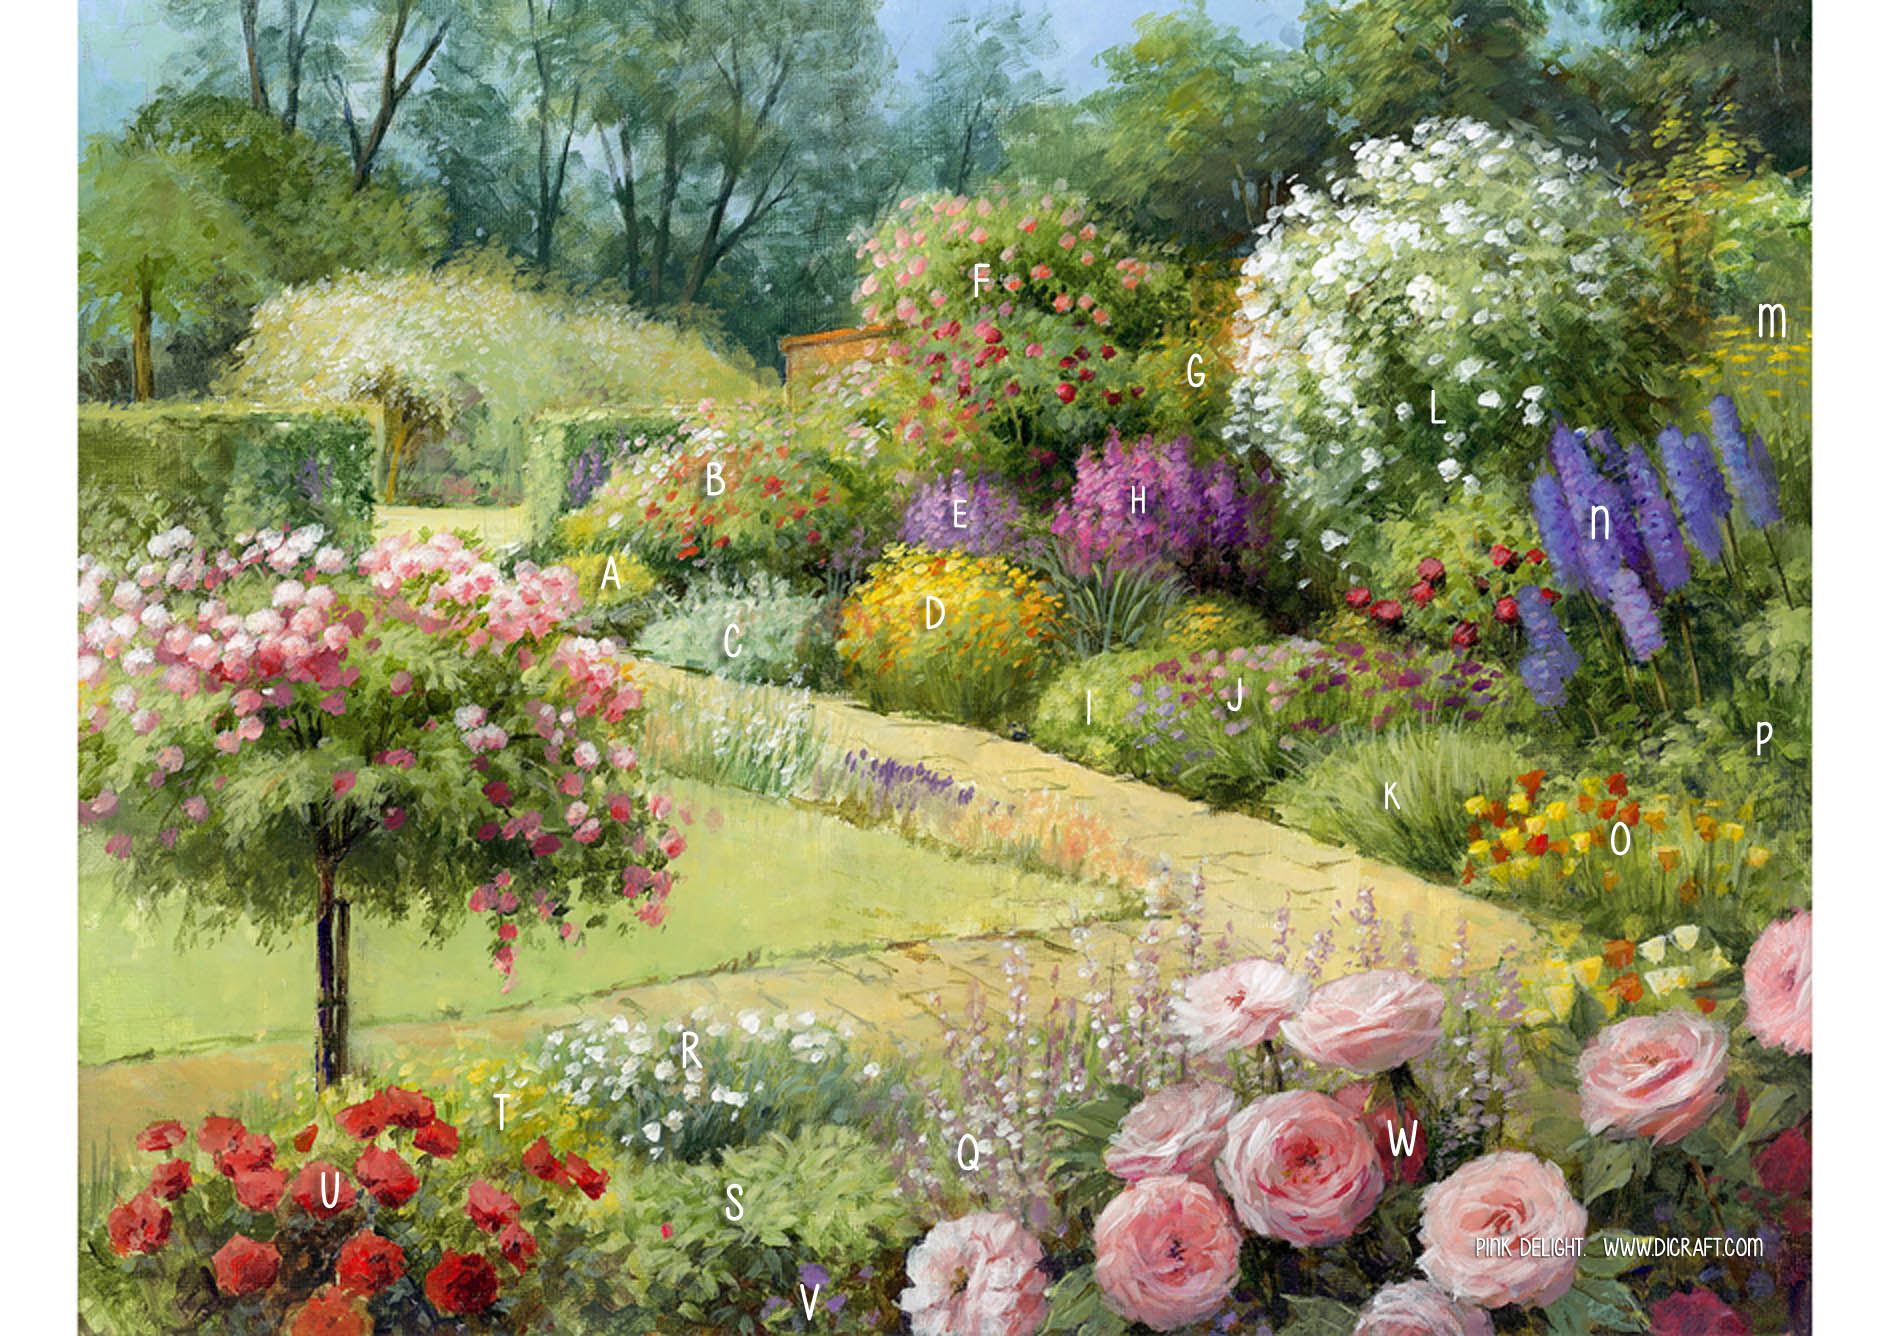
For this chapter (Chapter 3) I completed step B and I will show steps C, D, E, F, G. Let's start. Enjoy! 
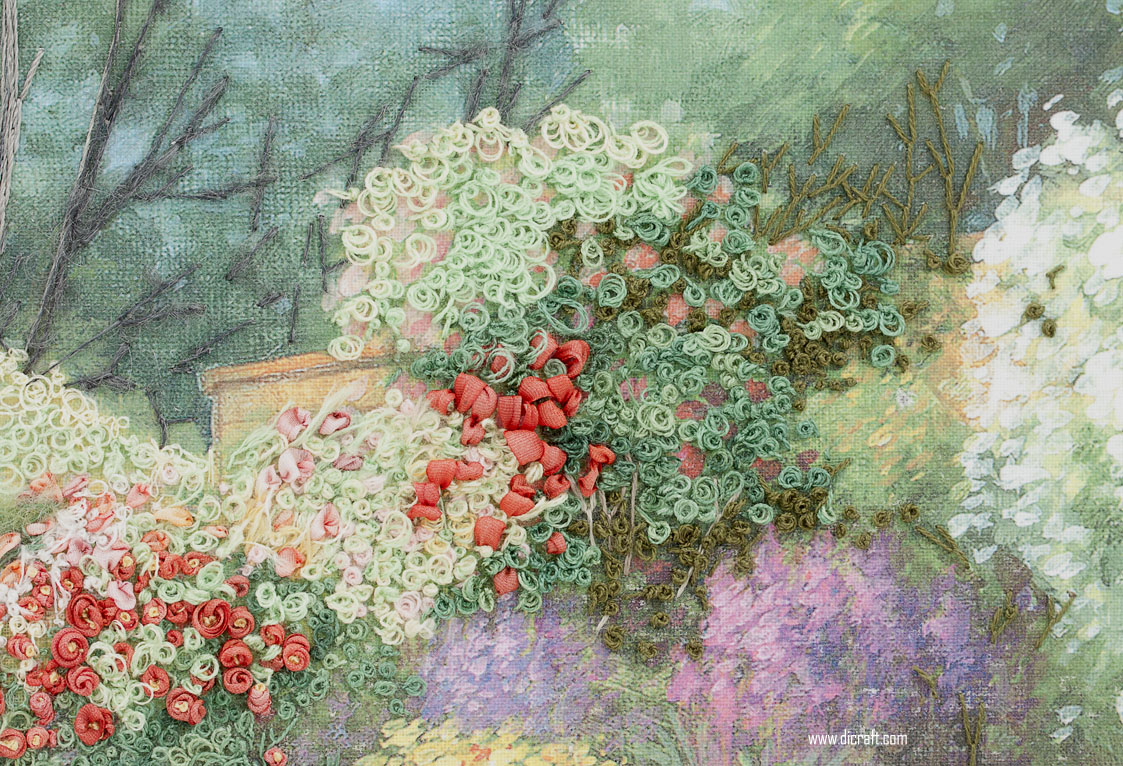
Step 1: Make the red petals in section B.
Use a size 20 Chenille needle and thread up with the 4mm ribbon number 58. Make loop stitches as you did in step A in Chapter 2. Work over a spare tapestry needle (or similar object) and make loops as shown below. Click on the images to enlarge 
Step 2: Make the branches in section F.
With 2 strands of the 4145 thread, form the branches (to the right of the red loops) in fly stitch, making the anchoring stitches longer than usual. 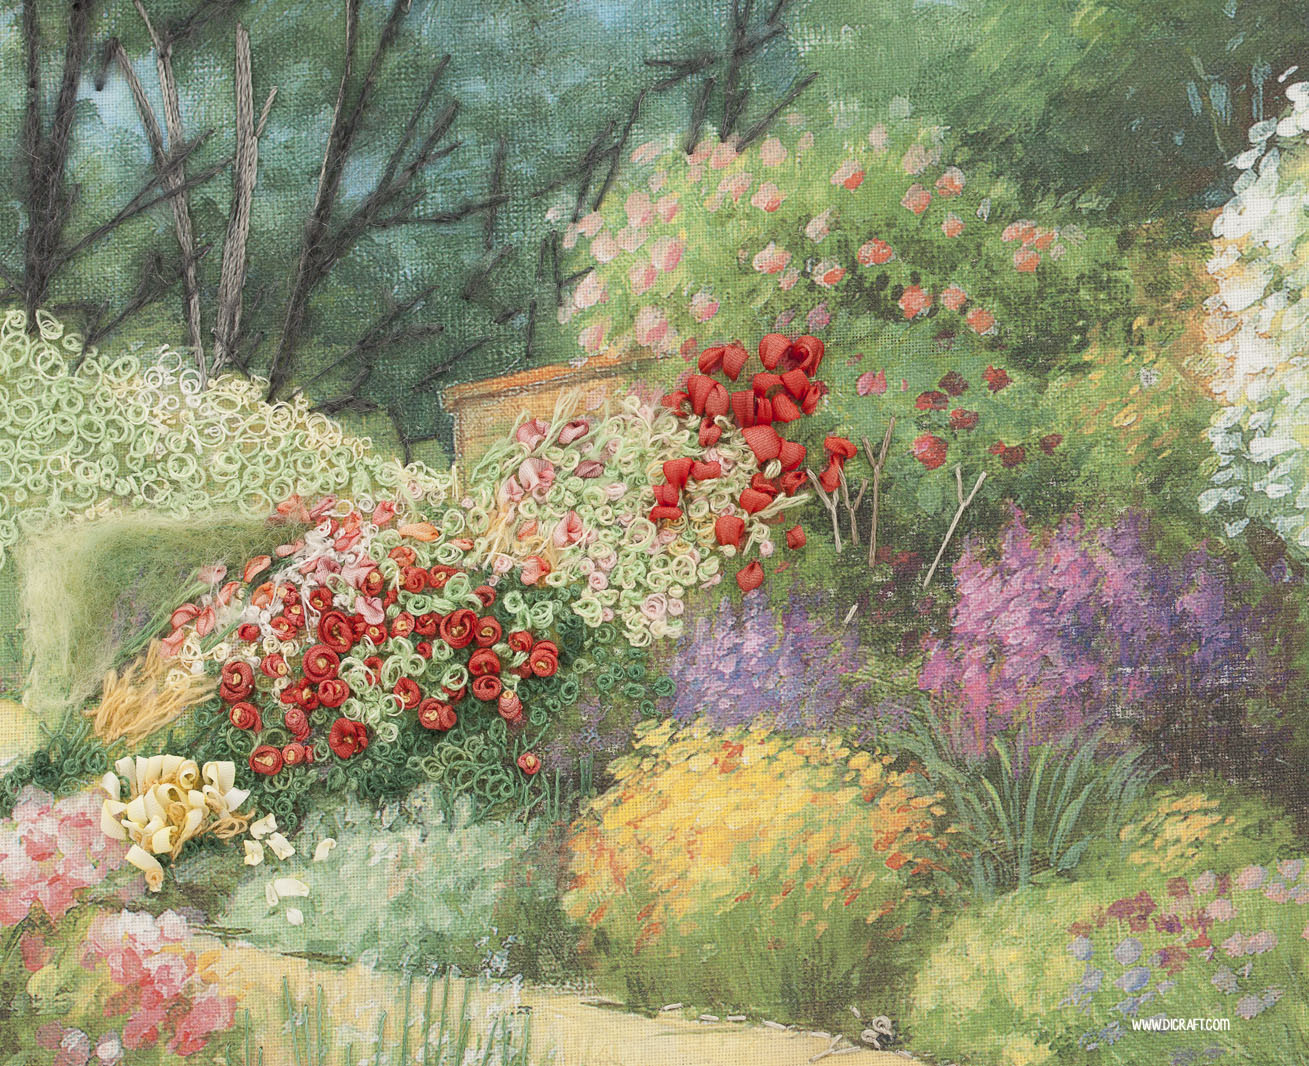 Step 3: Using left-over thread. When you have a thread on your needle (and it's not short enough to discard) don't waste it. Rather use it to add colour and texture somewhere else in the design. See how I used the same thread to embroider the edge of the pathway? Use fly stitch as you did above or use straight stitches or French knots.
  Step 4: Make the avocado green leaves in section F.Refer to the picture below. Use two strands of 4045, form loose French knots between the red loops as you did for step B in Chapter 2. Wrap thread two or three times around your needle and keep your tension very loose.
 Hint: To form loose, frilly knots, be sure not to tighten the wraps around the needle before taking it to the back of your work. Hold the loose wraps when you take the needle and thread to the back and you will see how they make lovely circular shapes. Ideal for filling in background detail.
 Step 5: Add the dark green shadows Fill in the darkest areas first. Hint: start with the darkest areas as this helps to create depth in the design. It's difficult to see the dark areas if you don't stitch them first.Change to 812 dark green thread, 2 strands, and make French knots (wrapping thread tighter around your needle than before) to fill in dark shadows. Use the same thread and make the branches in fly stitch or feather stitch. See the picture below.
  Step 6A: Add more leavesUse two strands of 4045, add more avocado green leaves as shown below. Form loose French knots as you did in step 4 above.
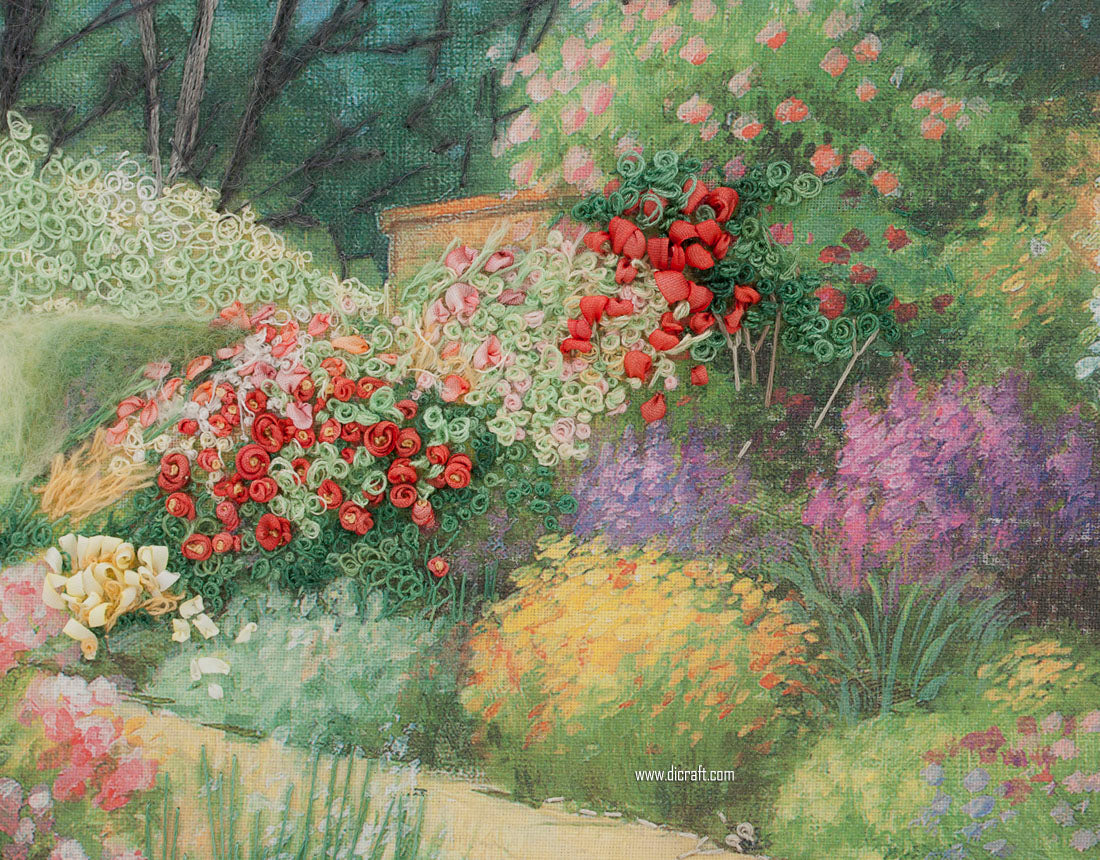
  Step 6B: Add the yellow/green leaves Use two strands of the apple green thread number 729. Make loose French knots, wrapping the thread two or three times around your needle. Change to the yellow thread number 112 and make the yellow leaves in the same way.
  Hint: If you have difficulty in pulling your needle and thread through the fabric, you may find the raw ends (that were threaded through the eye of the needle) have frayed. Trim the ends and you will find it easier to pull through your fabric. Step 7. Make the pink rosesUse 4mm ribbon number 108 and make the bright pink roses using the twirled ribbon rose technique as you did in step C in Chapter 2. You could also make detached chain/lazy daisy stitches. Keep them quite loose and rounded. With two strands of 118 golden yellow thread, make the yellow stamens inside the roses. Use French knots in the centre, wrapping thread twice around your needle. Make 1, 3 or 5 knots inside the flowers. Change to 4mm number 37 ribbon and make the lighter pink (salmon pink) flowers with loop stitch as you did for the red roses in step 1 above. You could also use one-wrap French knots for the smaller roses buds or make twirled ribbon roses.
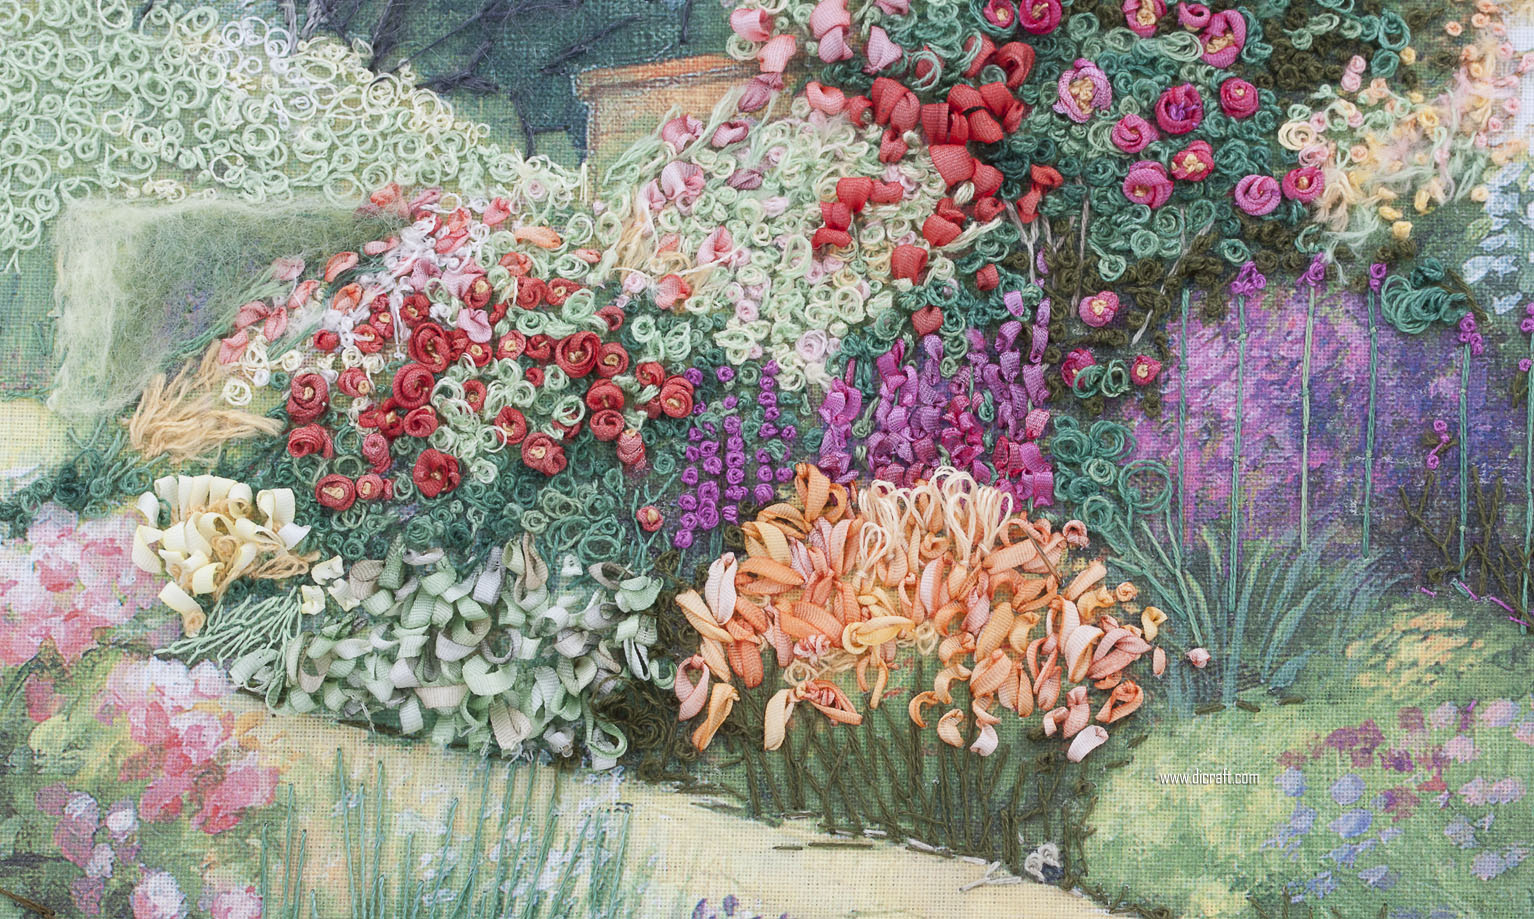
  Step 8. Make the green shrub (Section C)Thread up with 2mm number 17 ribbon. Start along the paving at the bottom and work upwards. Make loop stitch as you did before, working over the large tapestry needle. As you reach the top of the shrub, change to ribbon stitch to form flatter, smaller leaves. Cut and trim some of the loops along the paving if you like.Make the small teardrop-shaped leaves between shrub C and the yellow bush. Use 1 strand of apple green 729 and make detached chain/Lazy daisy stitches. Work from the top down towards the paving, making the stitches at random angles. See the picture below.In front of shrub C (alongside the orange shrub) make the dark patch of leaves with 812 thread (one or two strands) and form loose French knots. Work up behind the orange flowers to add the dark green leaves. Stitch the dark leaves in front of the orange bush using fly stitches with long anchoring stitches. Add some horizontal straight stitches along the edge of the paving. If you have enough thread on your needle, keep working along the edge of the path by adding straight stitches, fly stitches and loose French knots.
Step 9. Make the lilac Delphiniums (Section E)
Thread up with 812 dark green and make long straight stitches to form the stems that will hold the lilac flowers. (see adjoining stems as a guide). Change to number 468 lilac thread (2 strands) and working from the bottom up towards the tips, make French knots, wrapping thread three times around your needle. As you reach the tip, make smaller knots by wrapping thread twice and then once around the needle. 
Step 10. Make more stems
Change to 4045 (two strands) green thread and make six or seven long stems for the larger lilac Delphiniums. Use any left-over thread on your needle and make loose French knots to form the rounded leaves on the right-hand side of the stems. 
Step 11. Make the peach flowers in section G
With 2 strands of 4100 thread, make loose French knots, wrapping thread once or twice around your needle. Make some knots tighter than before. Add a few single-knotted stitches in between. Change to 729 green thread and add green French knots and single-knotted stitches as before. Then trim the single-knotted stitches and fluff with the sharp point of your needle. 
Step 12. make more Delphiniums (Section E)
See the picture below and thread up with 2mm ribbon number 106. Starting at the base of the flower and working upwards, make small loose/puffed ribbon stitches to form the petals. Work over a spare tapestry needle and before piercing the ribbon to take the needle to the back of your work, push the ribbon up a little to form a puffed shape. At the tip of the flowers, make small straight stitches, stitching between the green leaves. 
Step 13. Make the green stems for section H and add some texture
With two strands of 4045 avocado green thread, make long stems. Use straight stitches, couching the stitch where necessary with the same thread to secure the stems onto your design. With one strand of the 468 lilac thread, make french knots at the tip of the stems and with the left-over thread on your needle, make fly stitches and straight stitches on the right-hand side of the stems. Change to the dark green 812 and add the shadows in the same area using a few fly stitches then adding some straight and feather stitches.  Instead of ending off, use the left-over thread on your needle to add more shadows by adding French knots, straight stitches or fly stitches.
Step 14. Make the orange flowers in section D
If you have not made the dark green stems yet, refer to step 8 as follows: make the dark patch of leaves with 812 thread (one or two strands) and form loose French knots. Work up behind the orange flowers to add the dark green leaves. Stitch the dark leaves in front of the orange bush using fly stitches with long anchoring stitches. Thread up with number 51 ribbon (2mm width) and make the orange flowers with detached chain/lazy daisy stitches, slanting them at various angles as shown in the picture below. Add a few French knots (one or two wraps around your needle) and make a few ribbon stitches for the smaller petals.  Change to 112 yellow thread (two strands) and make single-knotted stitches between the orange flowers for an interesting texture. I will show you next time what the completed shrub looks like.
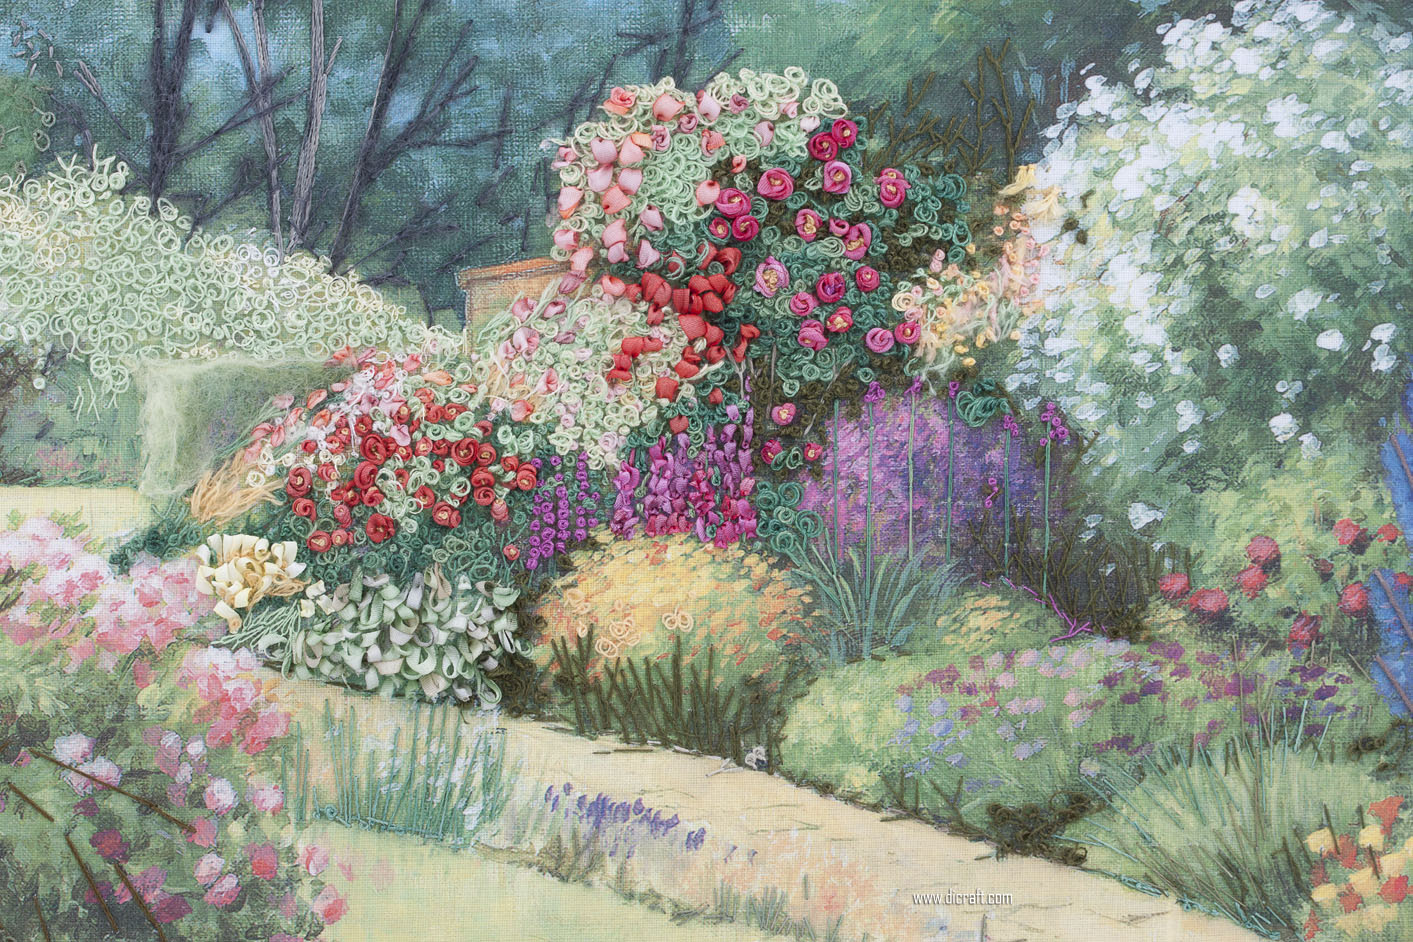
Chapter 3 completed, click on the image to enlarge...
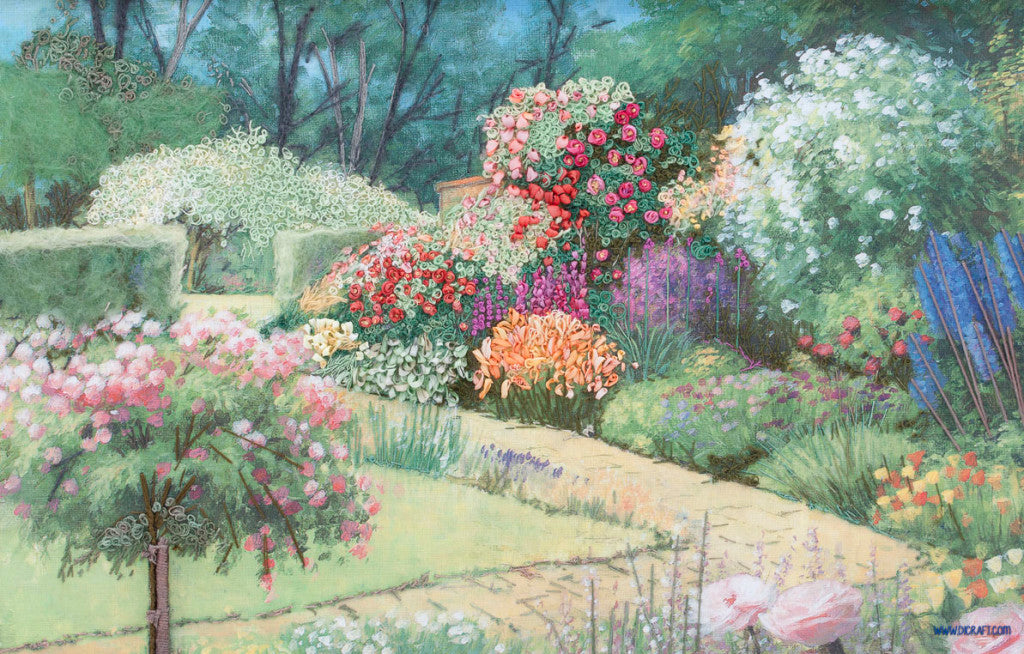 In the next Chapter 4 which you will find here, I plan to complete step H, I, J and in chapter 5, I will add the flowers in step 9 and 10. Step 11 and 12 I have decided to do towards the end of the project otherwise they will be in the way of hard-working hands. It's always best to work from the back towards the front when making stitches with ribbon.
I hope you enjoyed this tutorial and will have as much fun as I am having! It’s a lovely piece to make.
*-* If you missed the first chapter of this online lesson, have a look here for information about how to follow this lesson step-by-step in your own time, whenever you feel like doing something creative. You will find Chapter 2 here. It’s fun!
Have a good week, stitching world!
Love
Di


Leave a comment