
# Type at least 1 character to search # Hit enter to search or ESC to close
Cart


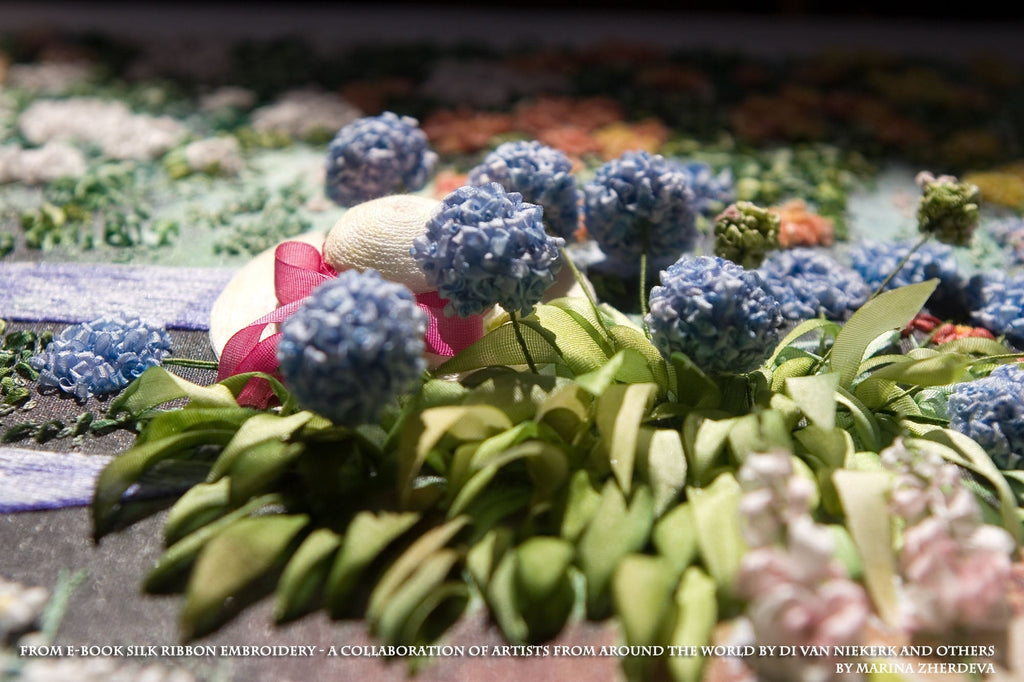
Today I want to show you how Marina made elements in this beautiful piece using the silk ribbons from my range and six strand threads. I will show you more elements in the weeks to follow. Enjoy!
This piece is featured in my e-book titled
Silk Ribbon Embroidery - a collaboration of artists from around the world
From the kit titled Blue Bench and embroidered by the
super-talented Marina Zherdeva

“Ribbon embroidery has captured me with its magic to transform a flat image into a three-dimensional work of art. It brings the image to life at a glance – it’s a miracle! It’s the only kind of embroidery where volume is created by different materials such as silk ribbons. The best result is achieved with silk ribbons, and especially those hand dyed by Di van Niekerk. I just love them, they offer unlimited possibilities in colour variations and are so natural, so rich in colour, so life-like!
I took up embroidery as a hobby in 2010 along with my other hobbies – some painting, cross-stitching and thread painting during my childhood; and sewing and design at school. My most recent passion is photography. I’ve learnt about composition of a design and colour schemes, which I consider to be the most important factors when choosing a design to embroider, but my interest in flowers determines my choice of design in most cases.
What I love most in creative needlework is to combine different techniques and materials, other than just ribbons and threads, and achieve extraordinary visual effects. Every design I choose challenges me to find new ideas and new approaches to transform the picture into 3D bas-relief – that’s real fun! Another admirable feature of silk ribbon embroidery is its simplicity and easiness to get a lovely piece after just a few stitches.
.

.
AGAPANTHUS
Keep in mind the direction of sunlight on the design.
Start to embroider on the left bottom part of Agapanthus and move towards upper right part.
Start with ribbon of dark colours underneath; mix darker colour with lighter colours and use mainly light colour ribbon on the upper right part of the plant.
Embroider mainly with reverse straight ribbon stitch. To add free-standing leaves to the Agapanthus leaves make some leaves connected with the design just from one end.
To prevent the loose ends from fraying use transparent glue at the cut sharp leaves edges.
.

.
Stems
Use thin bead wire and wrap green stranded cotton for each stem. Make each stem with 10cm of wire and 20cm of green stranded cotton.
Make a small loop on a piece of bead wire and attach a length of thread to it with a knot. Pass the full length of the thread through a glue stick and wind around the wire, moving the wire by fingers clockwise or anti clockwise – whatever is convenient for you.
Make sure the turns of the thread lay tight together, gently pushing the turns with your finger.
The wire should not be visible. Fix the end tail of the thread with glue and allow to dry.
Make another small loop at the start end of the wire again for better fixing in the ball and insert it into the Agapanthus ball.
.
.

.
.

.
Agapanthus flower heads
These flourishing balls are made separately.
Stretch silk organza in the hoop and draw a 32mm-circle with a sharpened, soft-leaded pencil or fine fabric marker. This diameter equals to 2 diameters of the ball painted on the design (d=16 mm).
Cover 32 mm-circle fully with looped ribbon stitches.
Make French knots (each of 2 turns) with a thread in the middle of each loop stitch.
stitch around the circle, leave thread tails.
Cut out the circle, leaving a 3–4mm seam of organza background fabric.
Add some toy filling, pull the thread tails and make a ball, hiding the organza edges inside. Insert the seam into the ball.
Tie the thread in a knot, hide or cut the tails. Buds are made in the same way as the Agapanthus balls, but their diameter equals to 20 mm, and the circle is filled with loose French knots.
.

.
Enjoy your weekend and happy stitching ♥
Love
Di
Get regular newsletters packed with tips, specials and new products!
Copyright © DI VAN NIEKERK. ALL RIGHTS RESERVED.
Added to cart successfully!

Guadalupe
Hola
No me canso de admirar vuestras obras, son increiblemente perfectas.
Por otra parte sus tutoriales son muy fáciles de seguir. Hace años que les sigo, he hecho alguna compra, lo único que lamento es vivir tan lejos, de otra forma seguro que asistiría a sus talleres
Felicidades